Autumn is the amazing color season with a breathy fall of air. It is the perfect time to rejuvenate How to Draw Autumn Leaves on Nails with an illustration that brings forth the beauty of autumn. Making designs of autumn leaves on your nails looks to be rather difficult, but there is a way to make it seem amusing and easy. In this tutorial, you will learn how beautiful your autumn leaf nail art can be.
Why Autumn Leaves Nail Art?
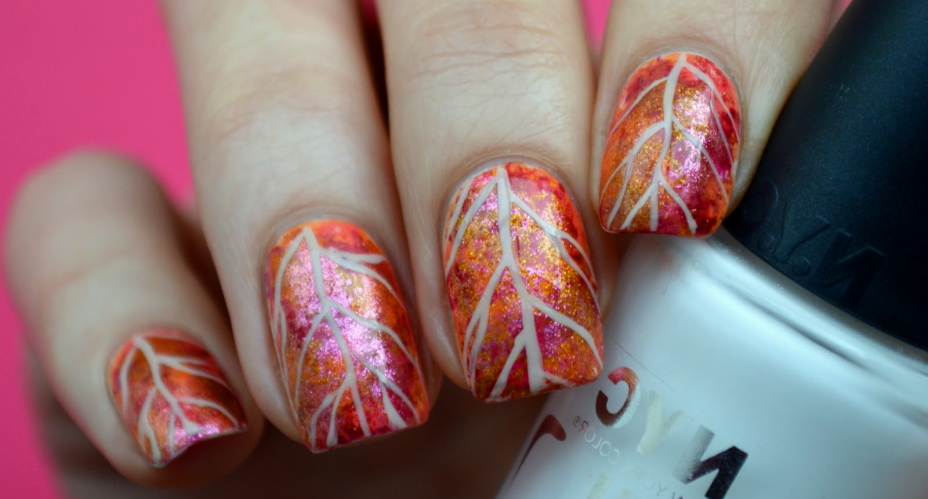
A leaf with colors, such as red, orange, and yellow, can give the whole of fall a sense. Its rich colors play a special role in expressing fall season. This seasonal touch will add to your style when you apply autumn leaves on your nails. It could be worn with casual and formal occasions.
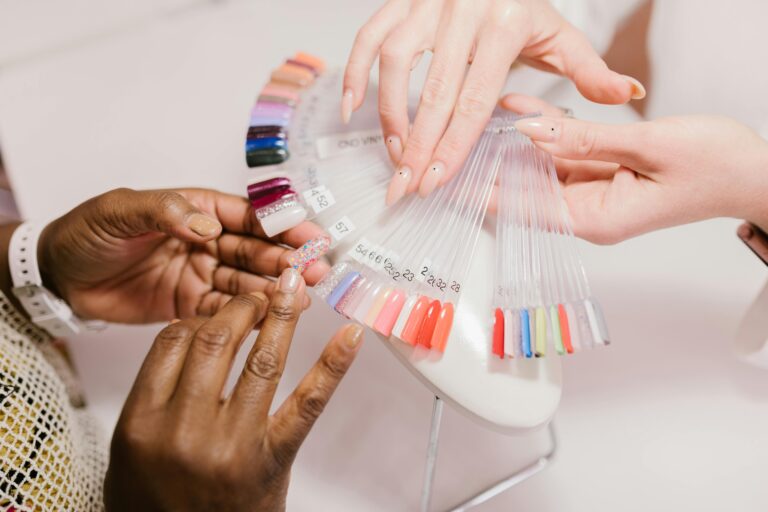
What You Would Require for Autumn Leaves Nail Art
To achieve your nail art first, you would require basic stuff. Here is what is required:
Base coat and top coat
Fall colors of nail polish (red, orange, yellow, brown, and green)
Nail art brushes
Nail dotting tools or toothpicks
Nail polish remover and cotton pads
A small palette or a piece of foil for mixing colors
A clear top coat for sealing the design
Once you have all these materials in place, you are now all set to start.
Step-by-Step Guide to Drawing Autumn Leaves on Nails
Step 1: Prepare Your Nails
Begin by cleaning your nails, removing the old polish with the nail polish remover, cutting and filing them to whatever length you prefer, using a base coat to prevent staining in the nails, and waiting until the base coat is dry.
Step 2: Fall-Colored Base
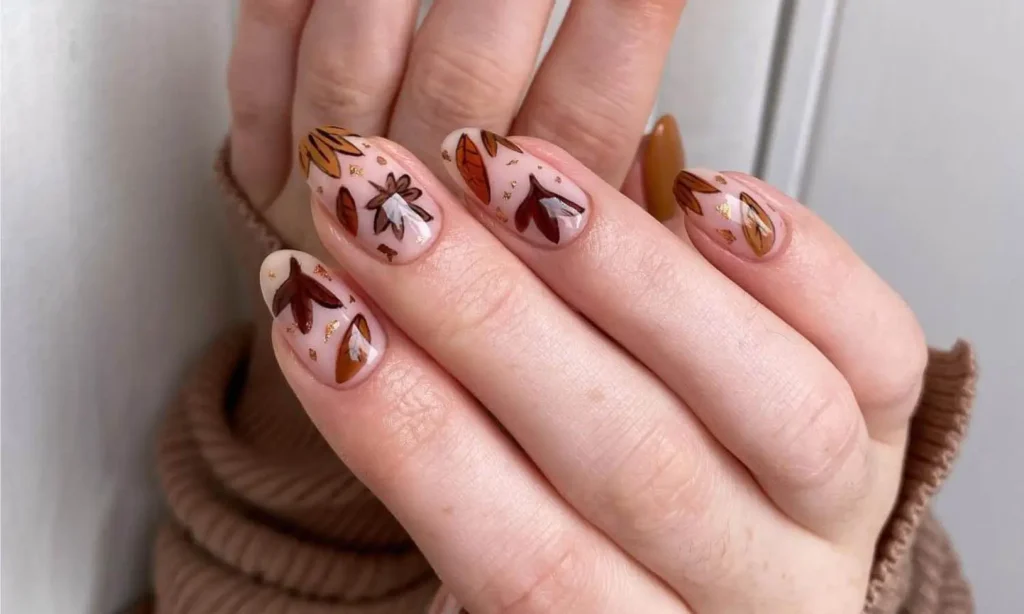
Base Coat: Select a color that resonates with fall. Neutral colors like beige, light brown, or soft yellow are excellent choices. Apply two very thin layers and let dry in between. This is your smooth base layer to work upon.
Step 3: Shape of the Leaf
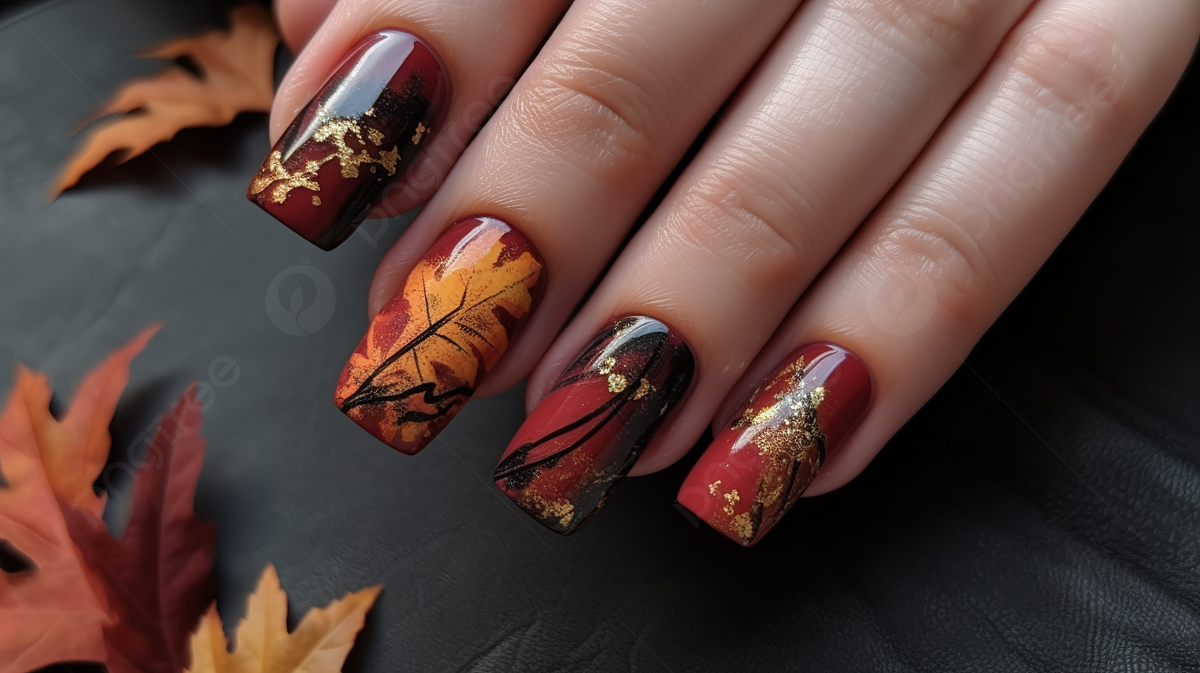
Now draw the leaves. Use a very thin nail art brush or a toothpick and dip it into the red or orange polish. Now you’re going to start drawing small leaf shapes on the nails. You’ll draw an oval first and then add tiny little points for the maple leaf look. Don’t worry if the leaves are not perfect because nature’s leaves are not absolutely perfect.
Step 4: Add Details
Once the leaf shapes dry, attach details that will make it look all the more realistic. You can also add the veins of the leaves by using a thin brush and deeper colors such as brown or deep green. You can do some strokes which can kind of simulate the texture of the leaves. You can also add some shading using a mixture of red and brown.
Step 5: More Leaves
You don’t need to use only one leaf. You could add a few more different colors like yellow or gold, and it would feel more autumn, making the design really pop. Hang the leaves on different nails or clump them for a bolder look.
Step 6: Add Finish Touches
If you want to add some interesting dash to the design, you can put tiny dots all around the leaves using a dotting tool or a toothpick. You can utilize gold or glittery polish and shine these dots. It adds this kind of playfulness in the design.
Step 7: Seal the Design
Once you feel happy with your leaf design, let the polish dry. To seal and protect the artwork, you should apply a top coat. This will give your nails that smooth, shiny finish. Make sure to let it dry completely before touching anything.
Autumn Leaves Nail Art FAQs
Q: Can I use a stencil to create the leaves?
A: Yes, this makes it easier. Stencils also provide more accuracy in case you are not yet expertly skilled in nail art.
Q: If I do my drawing in error?
A: Don’t worry if you make a mistake. You can actually correct it with a small brush that has dipped in nail polish remover. You will gently go over the design so that you do not smear the rest of the remaining parts of the drawing.
Q: How long does the drawing last?
A: Proper application and a good top coat can make your autumn leaves design last 7–10 days.
Q: Can I use acrylic paints instead of nail polish?
A: You bet many nail artists use acrylic paint because it’s easier to work with and dries faster. Just seal it out with a clear top coat, though.
Q: Do I need a nail dotting tool?
A: No, you can replace a dotting tool with the tip of a toothpick or even the end of a bobby pin.
Tips for a Perfect Autumn Leaves Design
Practice on Paper First: Make drawings of a leaf shape on paper before applying them to your nails. This will help you improve the accuracy of the drawings and thus make it easier for you.
Use Quick-Drying Polish. This will prevent smudging. It saves you time and allows each layer to dry before adding the next.
Apply polish or details in thin layers. The thicker the layer, the longer it takes to dry and the quicker it smudges.
Add fall flavors using color creatively. Don’t limit yourself to traditional fall colors. Add a little extra metallic or glitter polish for that glamorous effect.
Tape up the Cuticle for a Sharp Line: Use tape to create a clean, sharp line around your nail. The tape will keep polish off of the skin.
Fall Nail Art Ideas
There are so many different ways you can personalize your fall leaves nail art. Here are a few variations you could try:
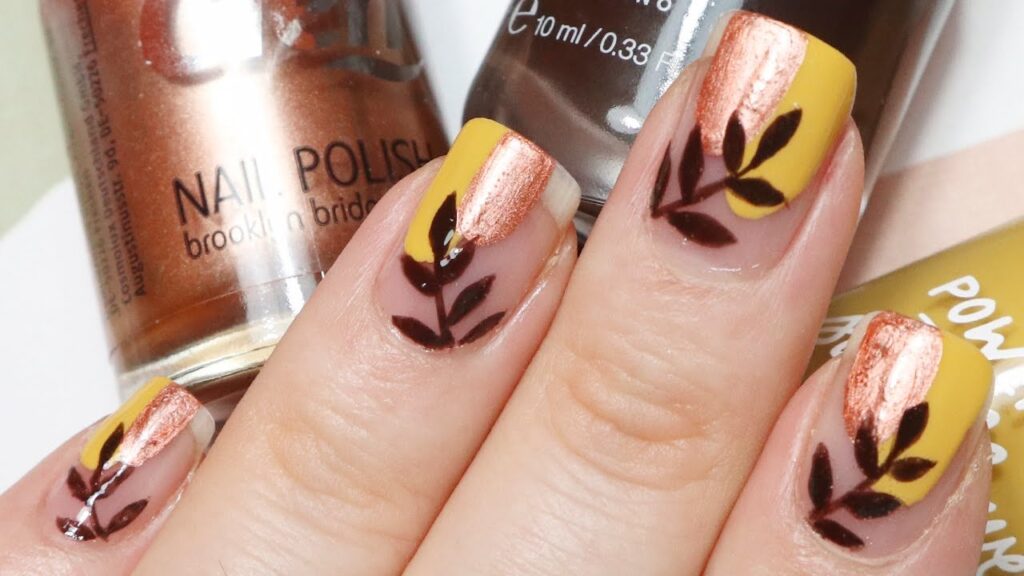
French Tip with Leaves: Instead of fully covered nails, this color can be added just to the tips. A plain neutral base coat and warm-colored leaves can be used to create a really very elegant but not too dramatic look.
Gradient Background: Using these fall colors like yellow, orange, and red, you can create gradient backgrounds and then simple silhouettes of the leaves on top of the gradient background – stunning sunset effect on your nails.
Outline Only: You can do outline leaves instead of coloring them. Use black or dark brown polish on a nude or light-colored background.