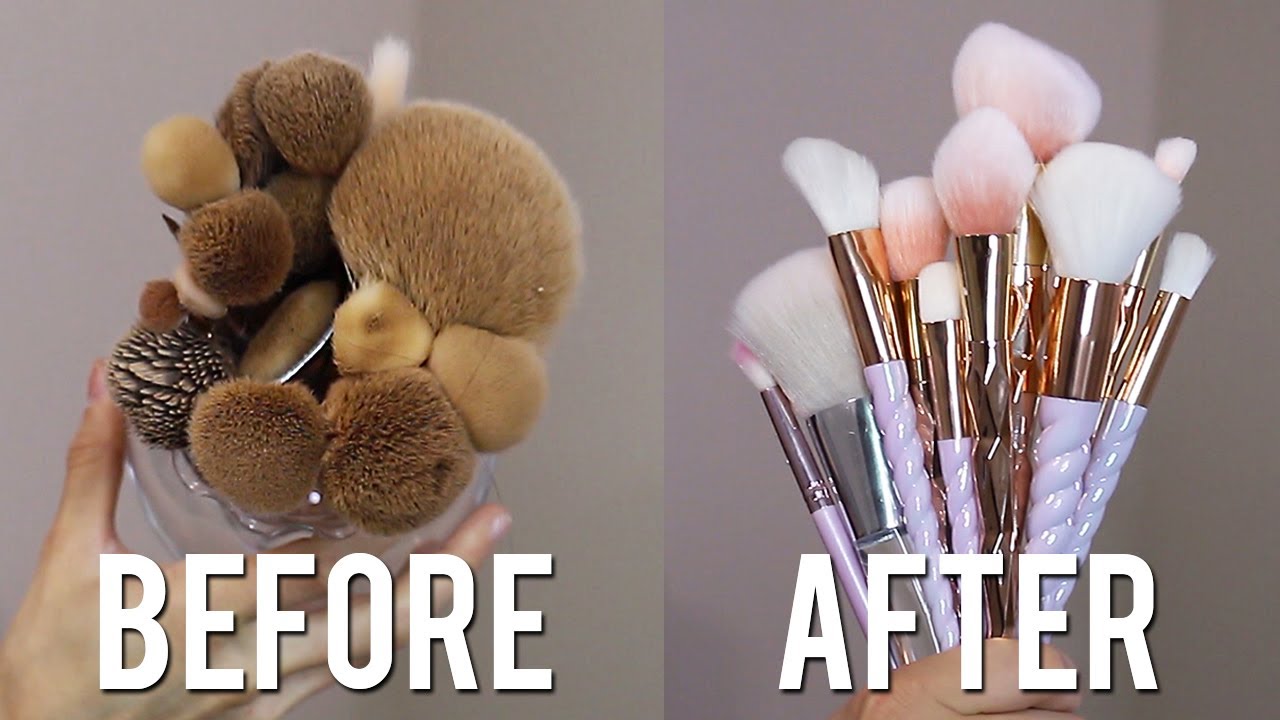
Makeup brushes are essential tools in your beauty routine, helping to create flawless makeup looks. However, if not cleaned regularly, they can harbor dirt, oils, and bacteria, which can lead to skin irritation, breakouts, or poor makeup application. To ensure both the longevity of your brushes and the health of your skin, it’s important to clean your brushes properly. In this blog post, we’ll guide you through the steps on how to wash makeup brushes efficiently and share some valuable tips to maintain them in top condition.
Why is Cleaning Makeup Brushes Important?
Makeup brushes pick up more than just cosmetics. They can accumulate:
- Dirt and oil from your skin.
- Dead skin cells that may cause irritation.
- Bacteria that can thrive in moist environments.
- Product buildup, making your brushes less effective.
Using dirty brushes can result in poor makeup application, with uneven blending and streaks. More importantly, they can transfer bacteria to your skin, which may cause acne and other skin issues. By cleaning your brushes, you’re not only extending their lifespan but also protecting your skin.

How Often Should You Wash Your Makeup Brushes?
How often How to Wash Makeup Brushes depends on how often you use them:
- Foundation and concealer brushes: These should be washed at least once a week, as they are used with cream and liquid products, which can easily harbor bacteria.
- Powder brushes: These can be washed every two to four weeks, depending on frequency of use.
- Eye makeup brushes: If you use them daily, it’s best to wash them once a week.
- Sponges and beauty blenders: Since they absorb a lot of product, it’s ideal to wash them after every use or at least twice a week.
Step-by-Step Guide to Washing Your Makeup Brushes
1. Gather Your Supplies
Before you start, you’ll need a few basic items:
- Mild shampoo or brush cleanser: Baby shampoo or a dedicated brush cleanser works best. Avoid using harsh detergents as they can damage the bristles.
- A bowl of lukewarm water.
- A clean towel for drying.
- A brush cleaning mat or your hand: Cleaning mats can help scrub the bristles gently, but your palm works well too.
2. Rinse the Bristles
Hold your brush under lukewarm running water with the bristles facing downward. This prevents water from seeping into the handle, which can loosen the glue that holds the bristles in place.
Avoid soaking the brush completely, especially where the bristles meet the handle, as it may cause the brush to weaken over time.
3. Clean with Soap or Cleanser
Pour a small amount of brush cleanser or baby shampoo into a bowl. Gently swirl the bristles of the brush into the soap, ensuring the soap penetrates the bristles. You can also place a drop of the cleanser in your palm and swirl the brush around to create lather.
For brushes used with liquid or cream products, you may need to work the soap in with your fingers to remove the buildup completely.

4. Scrub and Rinse
Once the soap is applied, gently scrub the brush on a brush-cleaning mat or your palm. This will help loosen any remaining product stuck in the bristles.
Next, rinse the brush under lukewarm water, again with the bristles facing downward. Continue rinsing until the water runs clear, indicating that all the product and soap have been removed.
5. Repeat If Necessary
For heavily soiled brushes, repeat the process of soaping and rinsing until they are completely clean. This is particularly important for foundation brushes and sponges that tend to hold onto product more stubbornly.
6. Squeeze and Reshape
Once your brush is thoroughly cleaned and rinsed, gently squeeze out excess water using your fingers or a clean towel. Be careful not to tug on the bristles.
After squeezing out the water, reshape the bristles to their original form. This will help them dry correctly without splaying.
7. Let the Brushes Dry
Lay the brushes flat on a clean towel, with the bristles hanging off the edge of a counter or surface. This ensures that air circulates evenly around the bristles, helping them dry faster and preventing mildew.
Avoid standing brushes upright while drying, as the water may drip into the ferrule (the metal part of the brush), which can loosen the glue and lead to shedding bristles.
8. Allow Adequate Drying Time
Allow your brushes to air dry completely before using them. Depending on the size and density of the brush, this can take anywhere from a few hours to overnight. Never use a hair dryer to speed up the drying process, as it can damage the bristles.
Pro Tips for Keeping Brushes in Top Shape
- Deep clean once a month: Even if you spot-clean your brushes after each use, a deep clean is necessary once a month to remove hidden bacteria and residue.
- Use brush guards: To maintain the shape of your brushes, consider using brush guards while they dry. These are little mesh sleeves that keep the bristles in place.
- Disinfect regularly: For an extra layer of hygiene, you can spritz your brushes with a mixture of water and rubbing alcohol after each wash.
- Avoid excess water on the handle: Water can weaken the adhesive holding the bristles in place, so always be mindful of keeping water away from the handle when cleaning.
Alternative Methods for Cleaning Makeup Brushes
If you’re looking for alternatives to traditional brush cleansers, here are a few options:
- Olive oil and dish soap mix: Mix equal parts of olive oil and dish soap for a cleansing and conditioning solution. The dish soap cuts through grease, while the olive oil keeps the bristles soft.
- Vinegar and water solution: For a natural disinfectant, you can use one part white vinegar to two parts water. However, be sure to rinse thoroughly to eliminate the vinegar smell.

How to Clean Beauty Blenders and Sponges
Cleaning makeup sponges like beauty blenders is slightly different, as they tend to absorb more product than brushes. Here’s how to clean them:
- Dampen the sponge under running water.
- Apply cleanser: Use a sponge cleanser or a gentle soap directly on the sponge.
- Squeeze to lather: Gently squeeze and massage the sponge to create lather, ensuring that the product buildup is coming out.
- Rinse thoroughly: Rinse the sponge under lukewarm water until the water runs clear.
- Squeeze out excess water and let the sponge air-dry in a clean area.


